Documentation
General information
Documentation for admins:
Documentation for users:
Examples
Upload Excel files using mappings
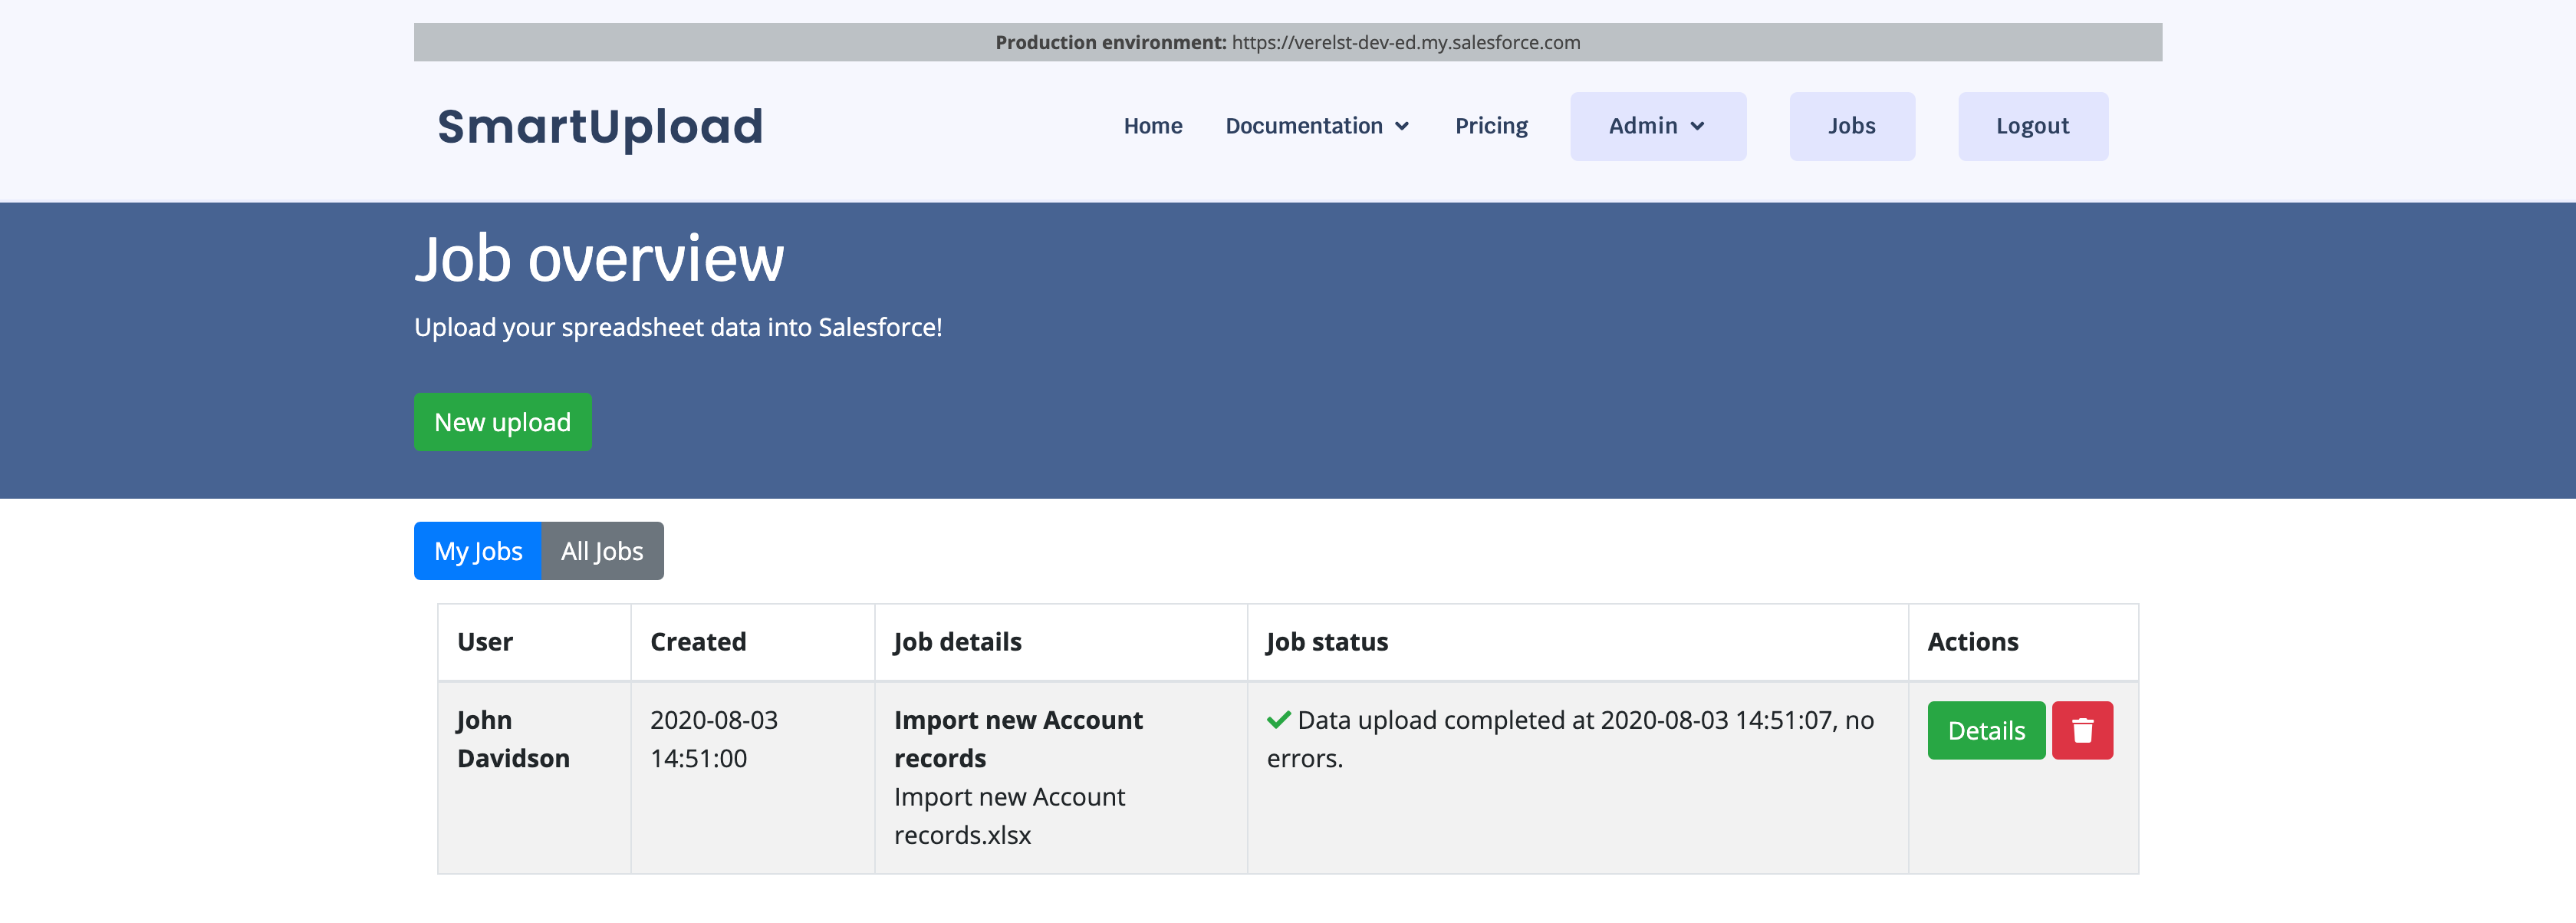
When you want to upload data into Salesforce from an Excel file through Smartupload, you start by going to the jobs overview page. Here you can see all the upload jobs that you have created.
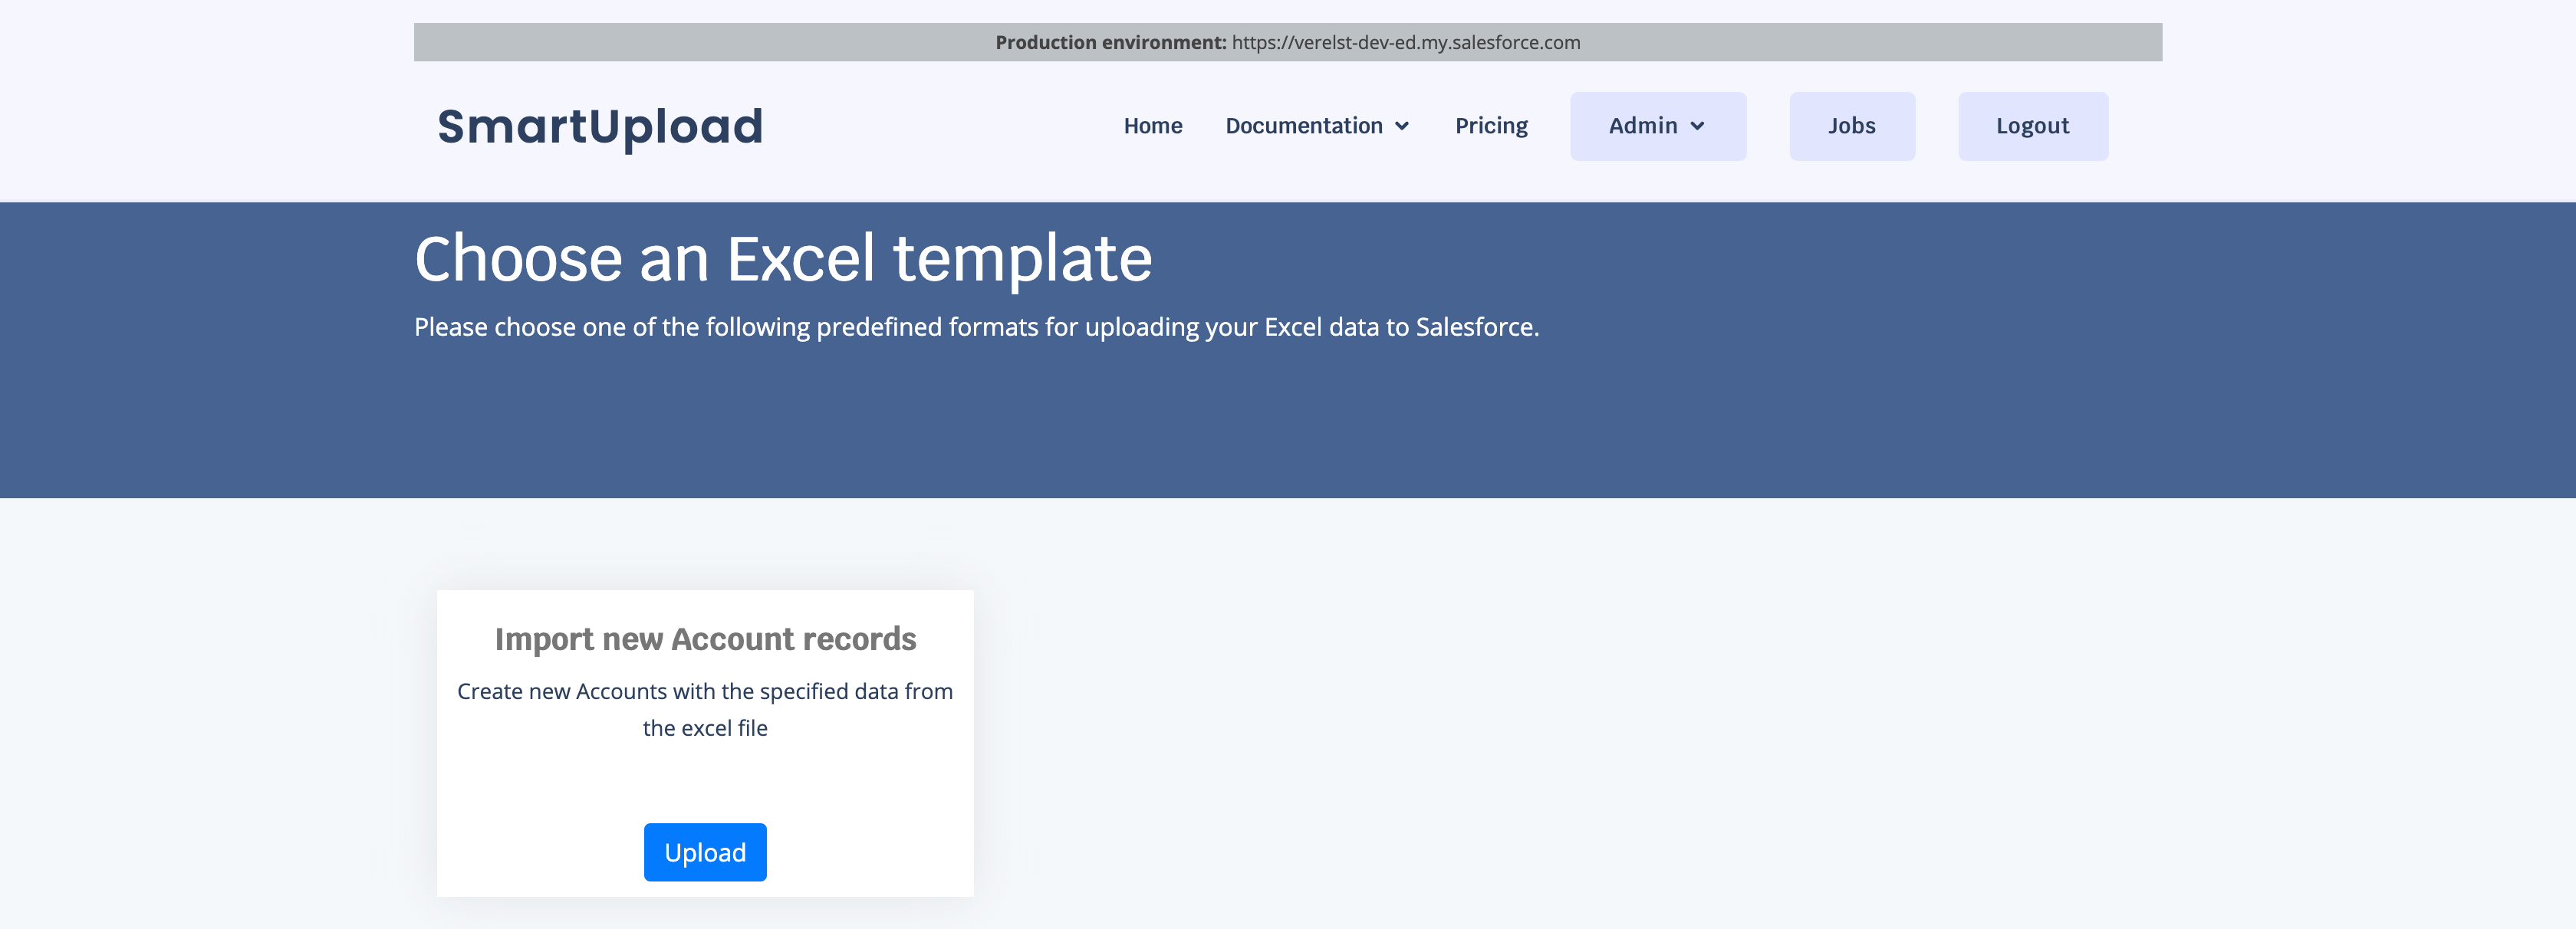
You can click the 'new upload' button to create a new upload:
The first step of the process is to select a mapping, which is predefined by your Salesforce Admin and describes how fields from your Excel files are mapped to Salesforce records.
Choose the mapping you wish to use by clicking the 'Upload' button.
The next screen allows you to upload your Excel file. Note that you can download a template XLSX file, that shows how the columns in your Excel file must be named.
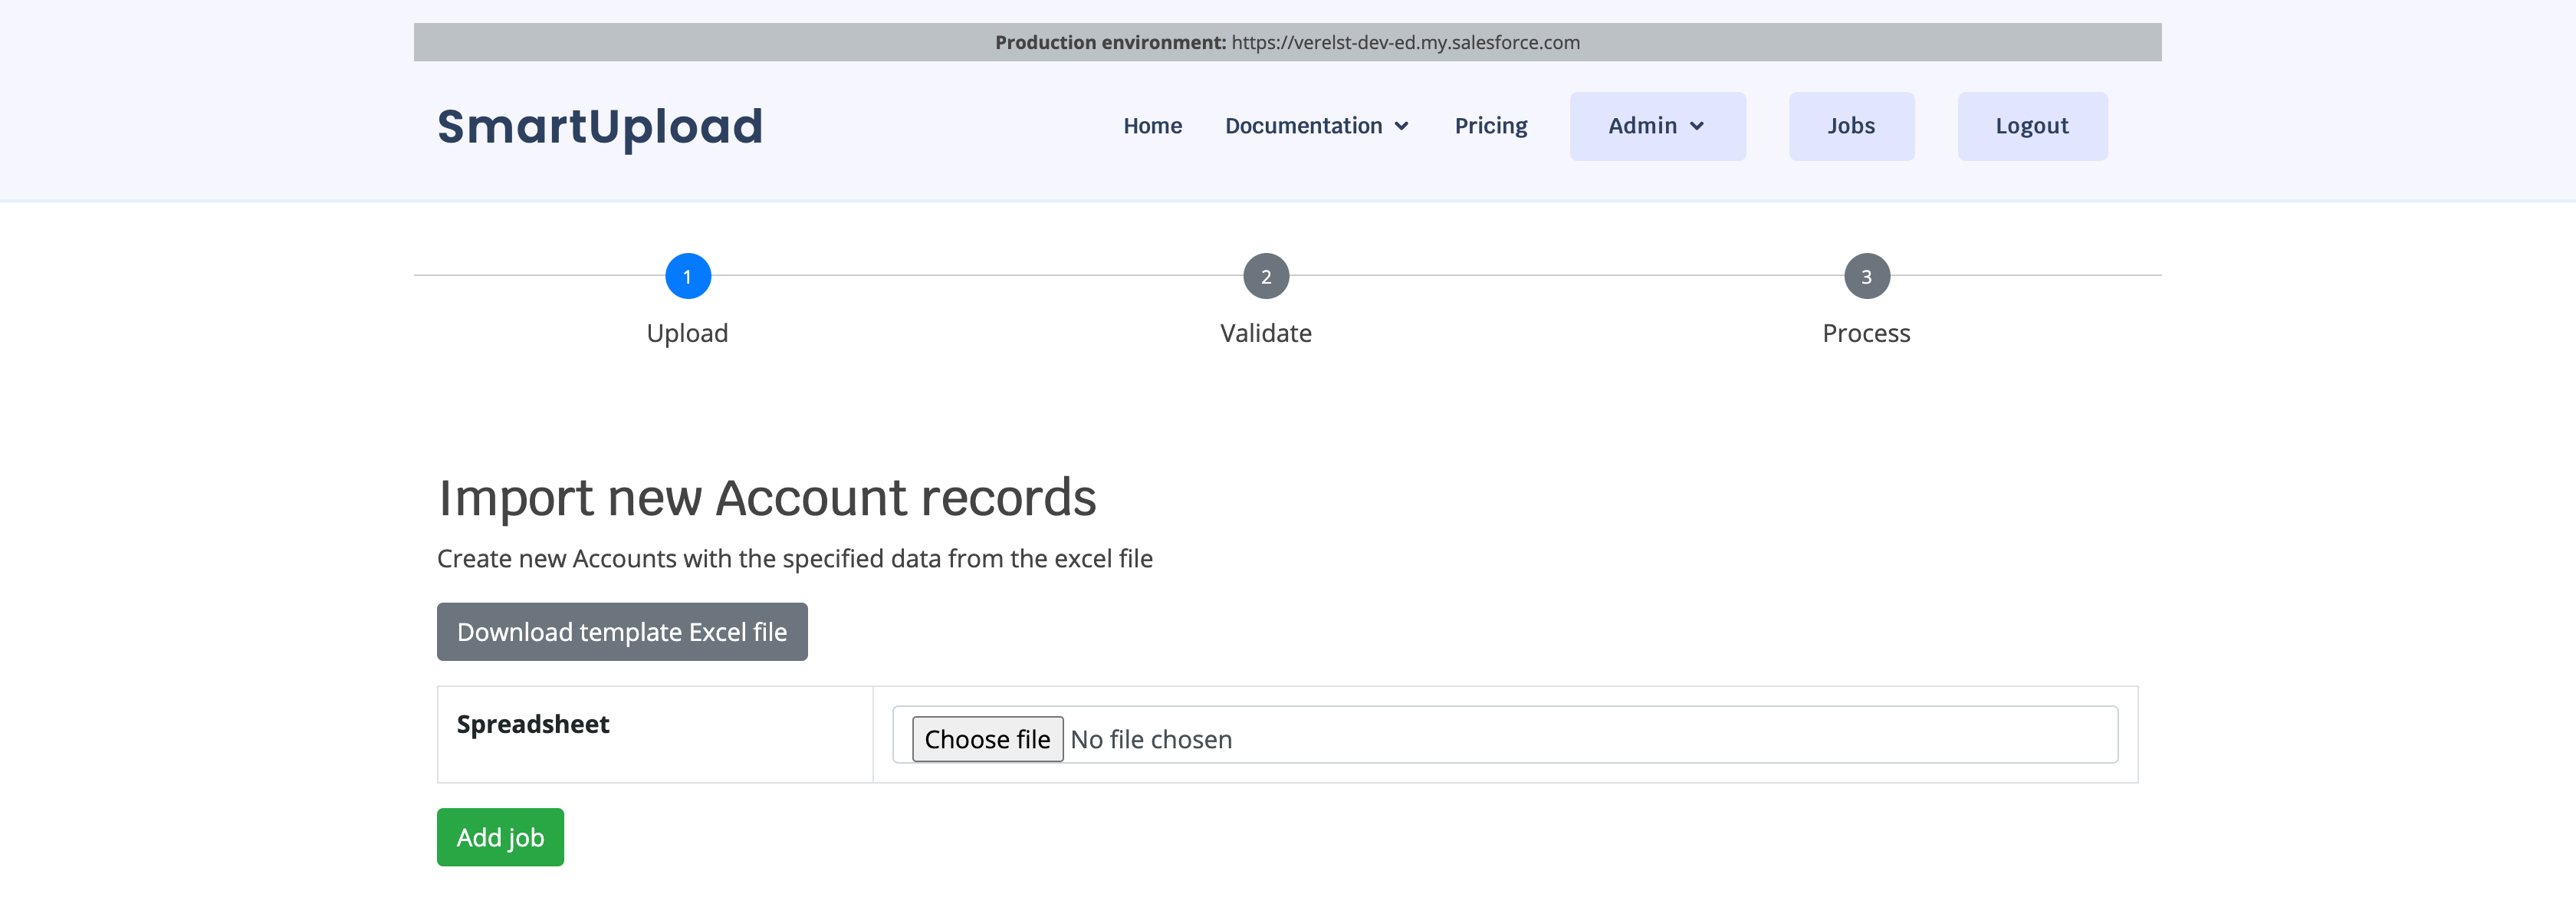
After selecting a file using the 'choose file' button, click 'add job'.
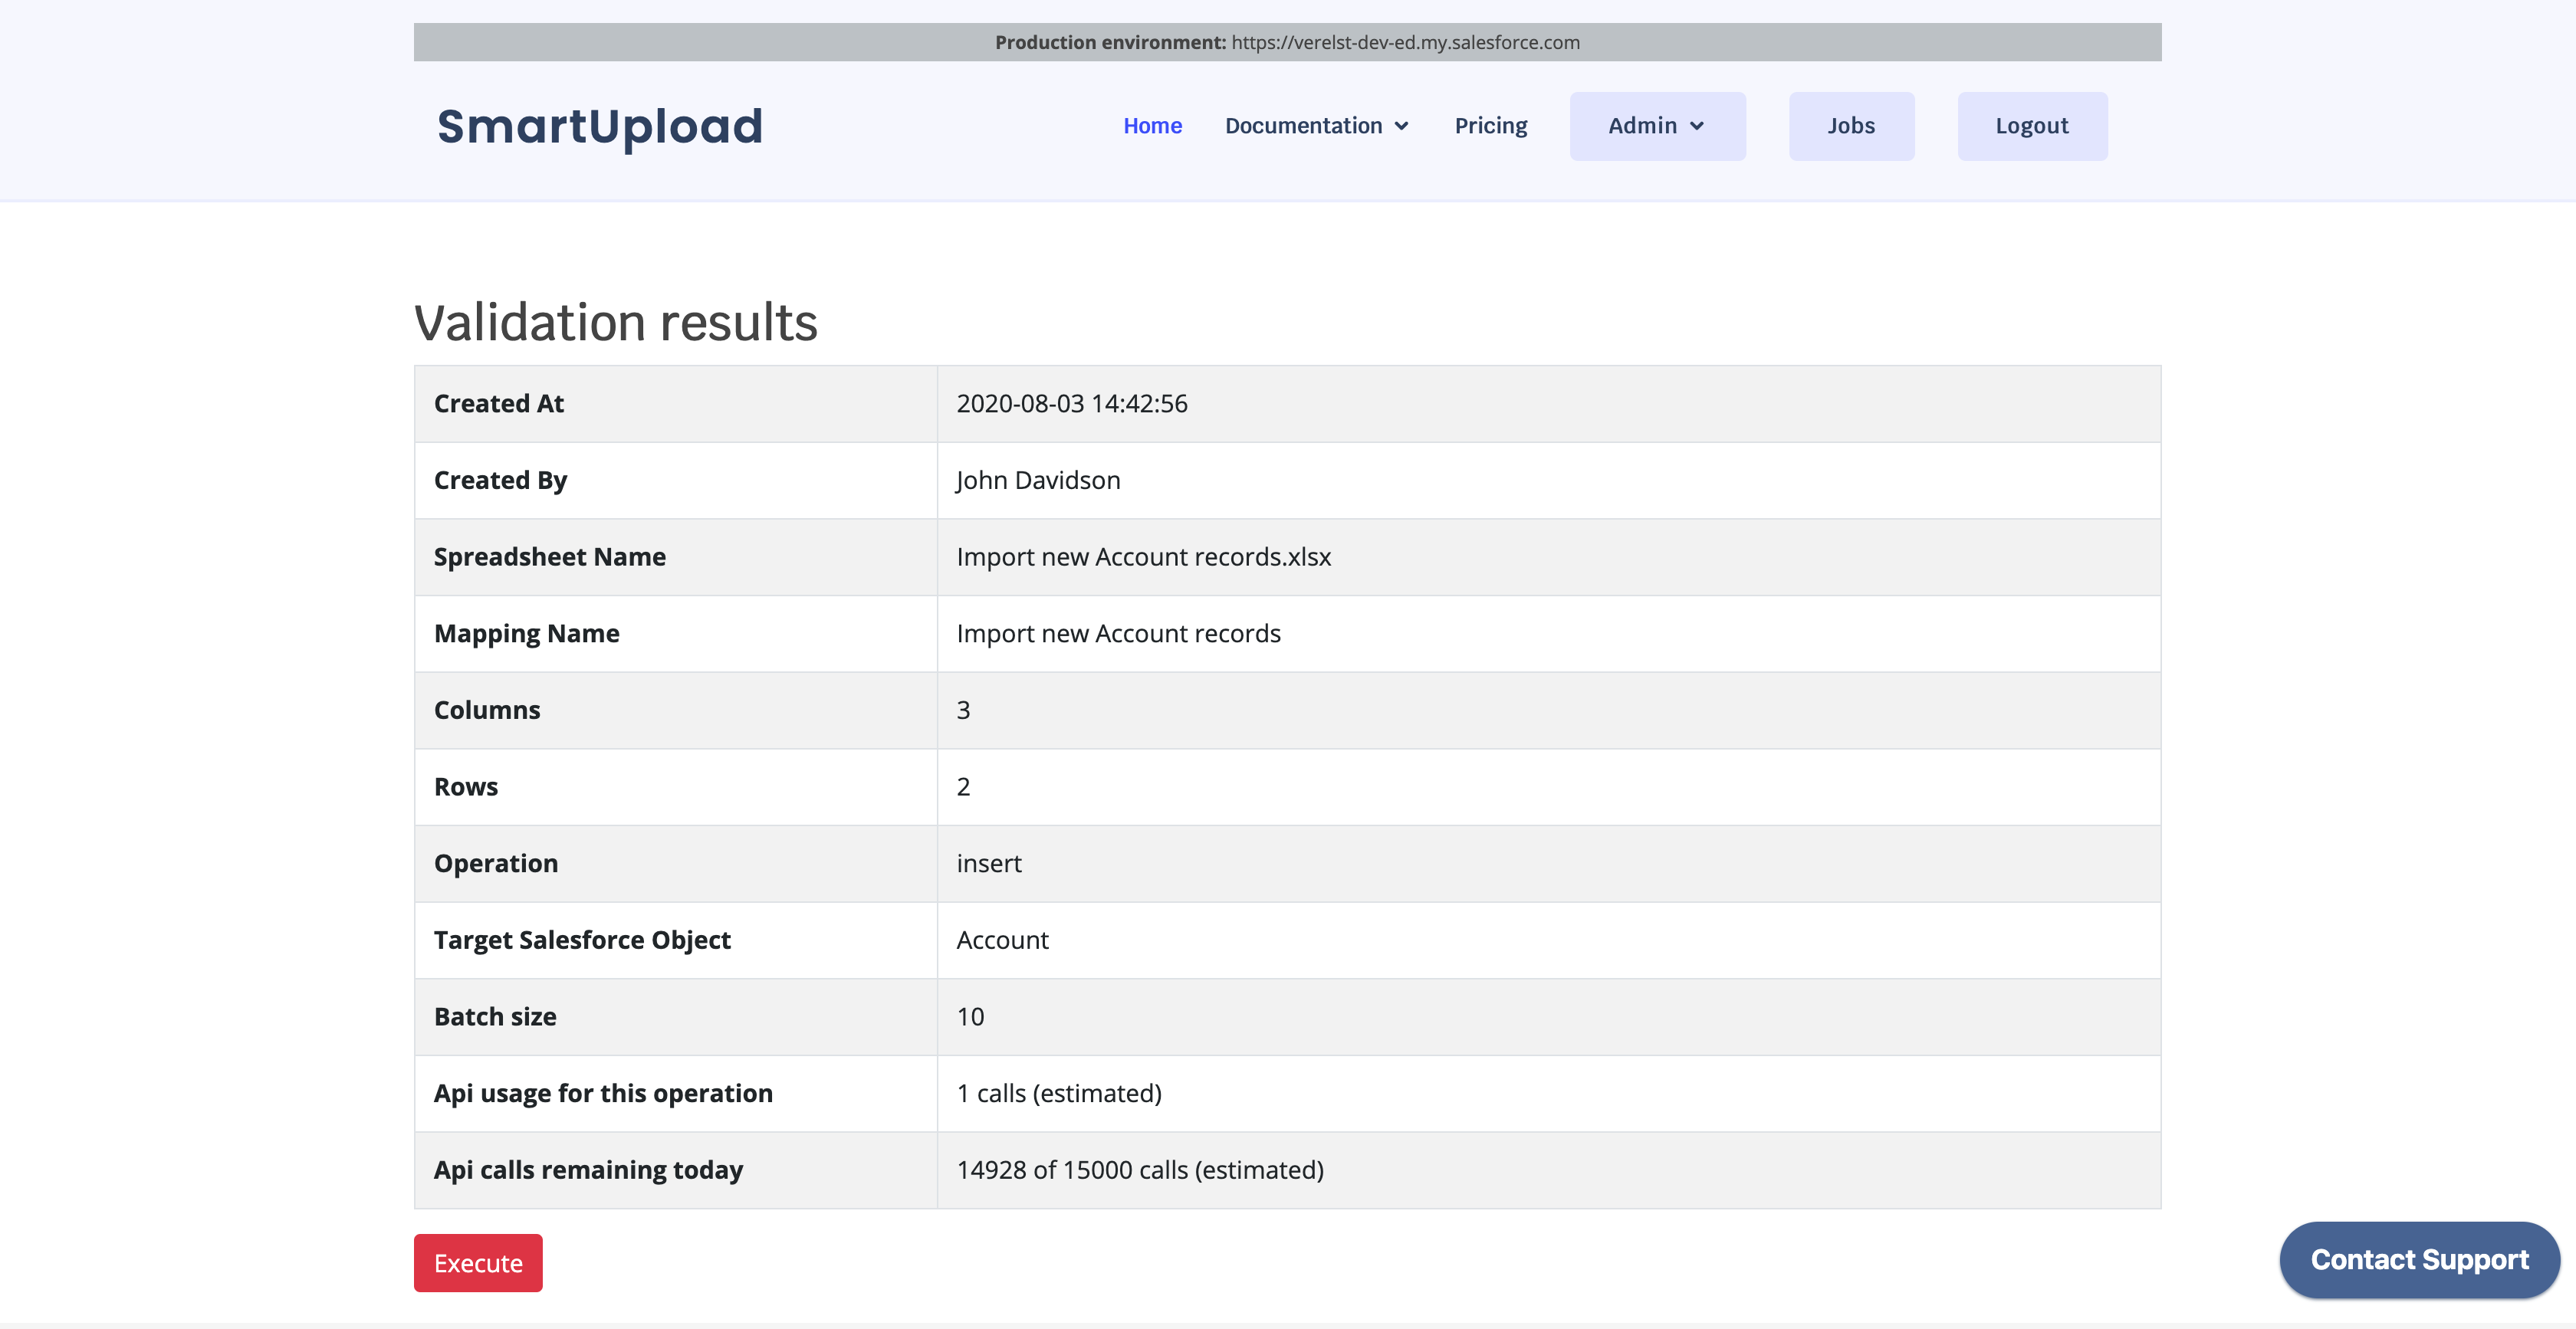
SmartUpload will now validate your Excel file to see if there is any data in there that requires corrections. If the excel file is completely valid, you will see a 'Execute' button at the bottom. Click that button to proceed to import your data into Salesforce.
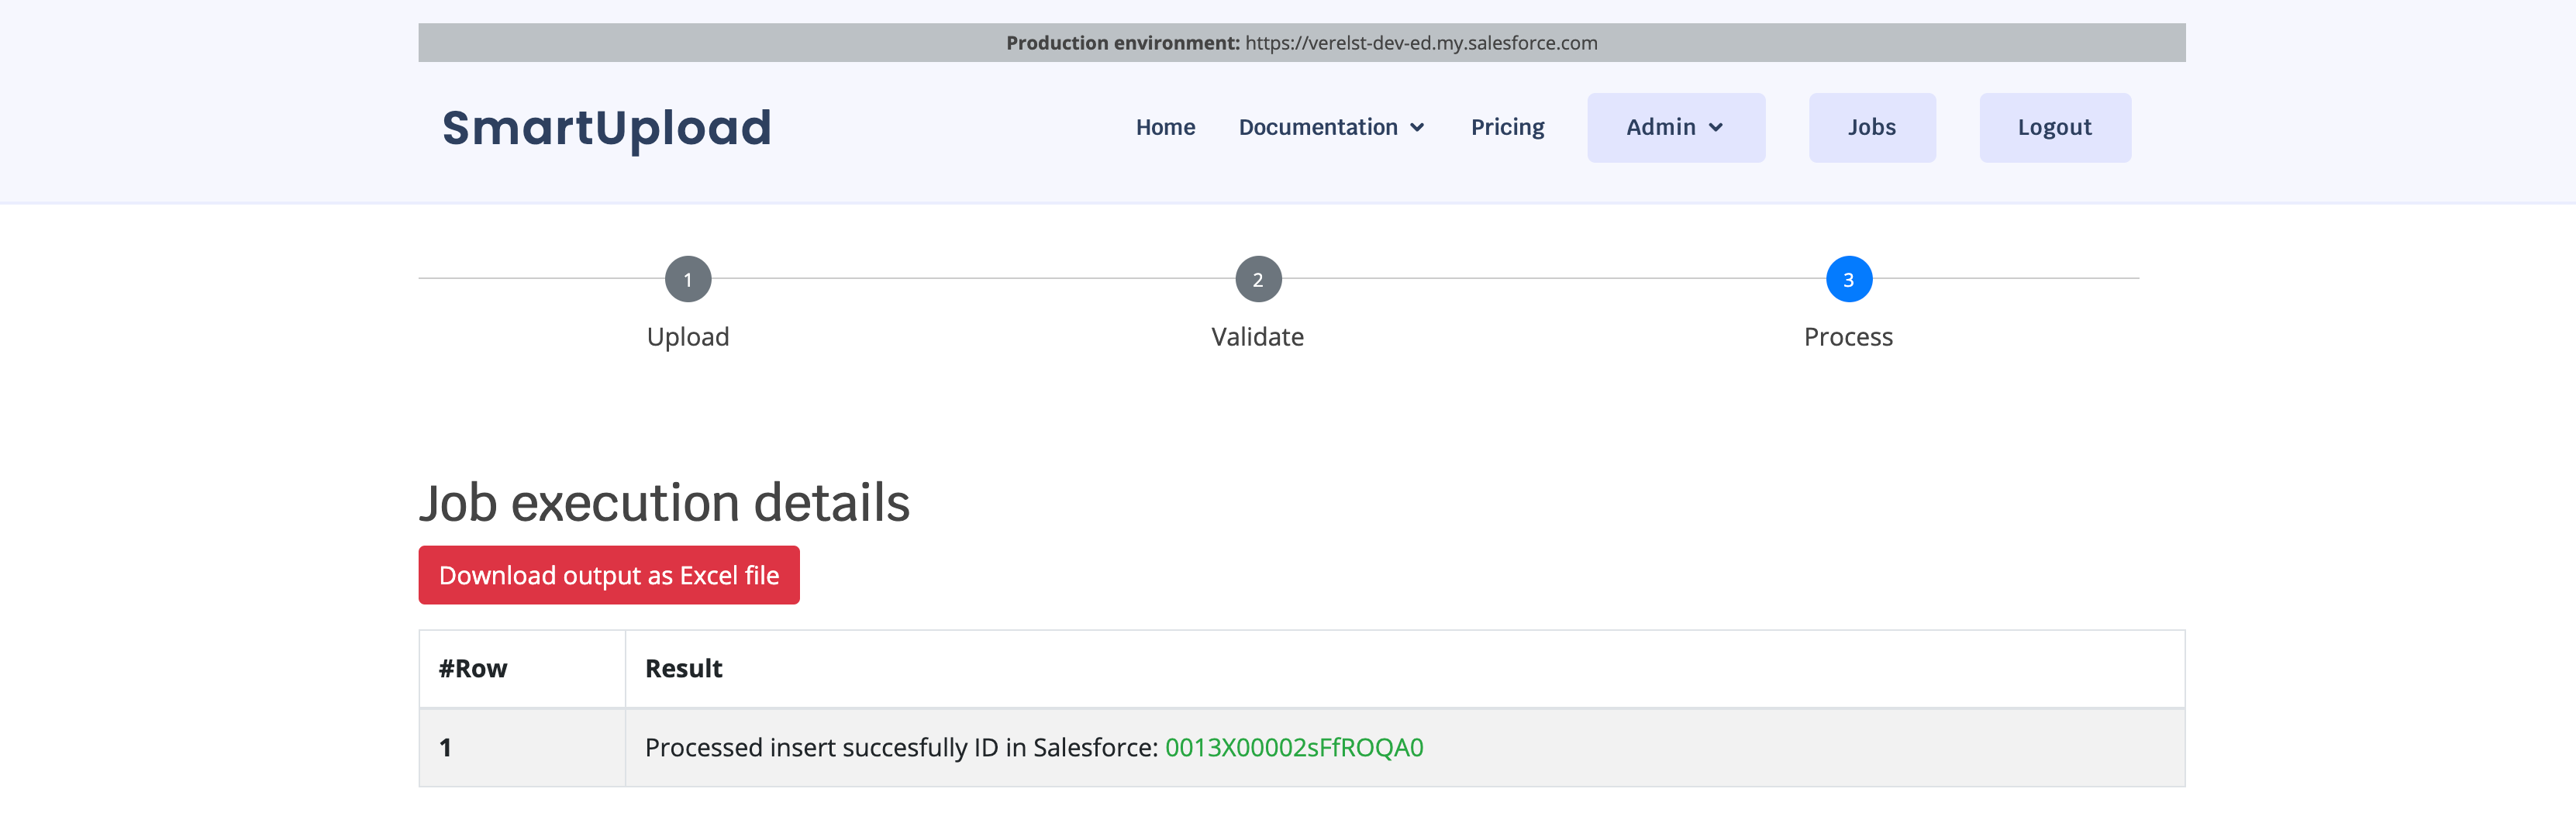
After the import is finished, you can download the details of the import using the 'Download output' button.
If you go to the list of jobs, you can see that your job has completed successfully. If you want to delete it, press the red 'trash' icon next to the job.

This allows you to clean up your view of all the jobs.